Super fast Drupal theme development with TailwindCSS
No need to write a single line of CSS code!!

When building the new version of this website I needed to rapidly build out a good looking, easy to maintain Drupal theme. I tested a number of options and in the end went for a custom Tailwind CSS based Drupal theme so here's why & how I built my Drupal theme with Tailwind CSS.
What is a Drupal theme?
If you're new to Drupal & CMS's a theme is the appearance & design of your website on top of your backend code. A Drupal theme can be made up of CSS, Javascript, Twig files, PHP files, YAML & more.
Since Drupal 8 Drupal adopted Twig as its main theme engine which makes templating a lot easier once you get used to it.
Drupal theme options
If you Google Drupal themes you'll get a tonne of results for both free Drupal themes & Premium Drupal themes so many in fact you might find it hard to find one for your needs!
Free Drupal themes:
Drupal.org/project/project_theme currently has around 800 Drupal 8 & 9 compatible themes all of which are free to download as well as the core themes which ship with the Drupal core. Drupal core themes aren't the prettiest (although that is changing with Olivero, more on that below) so in general they are just useful for reference & debugging.
The introduction of the Olivero theme to Drupal 9 is a big step forward as it's looking great so far but at the time of writing it wasn't ready for production use or as a base theme. I nearly used Olivero for this blog but it didn't seem quite ready to use & I thought it would be hard to maintain given it's still in active development. In a few more months I think Olivero will be a great theme to use for projects hopefully as a base theme if they decide to build it as a base theme (more on that below)!
Premium Drupal themes:
Drupals premium themes & modules eco-system is a bit different to Wordpress in my experience, there are lots of premium Drupal themes available mainly on ThemeForest.net but in all my 15 years of working with Drupal I've only used but a few. This is mainly because I'm a developer and can build themes myself but also I've always found most premium Drupal themes look great but are often completely overly feature-heavy for the average project.
It might look great on a theme sales page to have 20 header & footer options, 100 colour variations, support every site type you can think of but in reality your site probably doesn't need all these options and removing the bloat from a premium Drupal theme can be tricky.
For that reason I generally do not use premium Drupal themes for personal projects or client projects, as a developer I prefer to build leaner custom Drupal themes with a specific focus and only add the options I really need for the project.
So despite a healthy amount of free & premium Drupal themes available, for the rebuild of this site I wanted something lean & custom plus I'd never used Tailwind CSS with Drupal so seemed like a great way to test it out!
Drupal base themes:
So I mentioned Drupal base themes above so I'll just briefly touch on what Drupal base themes are and how they can be used. Drupal has a solid theme engine and like Wordpress you can have base themes (parent) for base styles & functionality and subthemes (child) for overrides & customisation. This can be really powerful if you are for example making a family of sites with similar structure & style, it also works great for Drupal multisite installations.
Say you have 3 brands, you create 1 generic base theme which contains your core template files, base CSS & Javascript and then you create a subtheme for each brand where you can for example override colours & logos to suit each brand.
Only downside of using a contrib or premium base theme is you need to keep it maintained & secure which adds maintenance overheads & the potential to break your subtheme if you don't stay on top of updates.
There is already a TailwindCSS Drupal theme but for the purpose of this tutorial I wanted to build a theme from scratch without any dependencies at all.
For this new site we're technically using base theme but mainly as a base to override as we please (more on that below).
OK onwards to Tailwind CSS.
Rapid Drupal theme development with Tailwind CSS
What is Tailwind CSS?

Tailwind CSS is a utility-first CSS framework, this basically means it doesn't have predefined components like Bootstrap & other frontend frameworks & instead you build everything with utility CSS classes. For example, Bootstrap has a "card" component, Tailwind doesn't but you can still build great looking "cards" using the utility classes.
Utility-first CSS does have the potential to bloat your Drupal theme but it does allow you to rapidly build a theme and in most cases without writing a single line of CSS code!!
Tailwind CSS allows you to pass your own custom settings and it also uses PurgeCSS so you can set it up to scan your files & make sure it only includes the CSS classes you use in your production builds. The PurgeCSS settings are all extendable in Tailwind so you can have it scan your Drupal theme for used classes and it'll remove the unused ones. Find out more about optimising Tailwind for production. We'll look at this briefly a bit later in the post.
So why use Tailwind CSS with Drupal?
For this project I used Tailwind CSS with Drupal for the following reasons:
- To learn something new: I've played with Tailwind before but never used it with Drupal so seemed like a good chance to test them out together
- To build rapidly: without having to write a tonne of my own CSS, why reinvent the wheel sort of thing
- It looks good out the box: I love Bootstrap but sites built with Bootstrap tend to look like they're built with Bootstrap!
- It's built to be extended & customised:
tailwind.config.jsgives near complete control over the builds, colours, components etc - It's mobile-first & responsive by default
- As mentioned above, PurgeCSS is built-in so you can easily remove any unused CSS
- The utility-first approach fitted this project will & allows rapid Drupal theme building once you've got everything installed
Tailwind CSS might not be a perfect fit for all Drupal projects but if you want to prototype or rapidly build something you should consider it. Ok enough theory let's start building!
Custom Drupal Theme development
I'm assuming you have Drupal 8 or 9 core downloaded & installed, if you don't follow the official Drupal install guide on Drupal.org.
First thing we'll need is a basic Drupal theme structure, to this we'll use the core Stable theme as a start & reference point. Stable is the theme Drupal core uses by default if you don't provide your own template files (and functions), it's an enforced base theme unless you opt-out of it by adding base theme: false in your themes .info.yml file, so technically we are using a base theme.
It provides minimal CSS so is pretty easy to work with & override. For our custom theme we'll use it as a reference to copy & paste over template files which is where most our work will happen since TailwindCSS will provide nearly all our CSS.
You can find all the core Drupal themes in core/themes directory of your Drupal installation. This can be a useful reference when building a custom theme as well as the official API documentation.
Base files/directories needed:
Replace THEME-NAME with the machine name for your theme. My theme is called tws_tailwind.
File: THEME-NAME.info.yml
name: tws_tailwind
type: theme
base theme: stable
description: 'Drupal theme development with TailwindCSS'
alt text: 'Screenshot of tws theme.'
core_version_requirement: ^9
version: VERSION

libraries:
  - tws_tailwind/global-styling
  - tws_tailwind/alpine-js
regions:
  header: Header
  primary_menu: 'Primary menu'
  content: Content
File: THEME-NAME.libraries.yml
global-styling:
  version: VERSION
  css:
    theme:
      assets/dist/css/styles.css: {}

alpine-js:
  js:
    https://cdn.jsdelivr.net/gh/alpinejs/alpine@v2.x.x/dist/alpine.min.js: {
      type: external,
      minified: true
    }
Dir: THEME-NAME/templates
Dir: THEME-NAME/assets/src/css + THEME-NAME/assets/dist/css
I prefer to put all my CSS, Javascript & images in a separate /assets folder but you can put them anywhere in your theme.
We've added Alpine.js to our libraries which we'll use later and I've just added 3 block regions to keep things simple for this tutorial, find out more about Drupal block regions.
Install TailwindCSS
Now we have the Drupal theme structure it's time to install TailwindCSS so it can be used in the theme. There are a number of different ways to install/setup Tailwind but for this tutorial I'll be using Tailwind CLI.
Open Terminal and enter your themes root directory:
cd /web/themes/custom/MYTHEMENAME
Assuming you have Node.js & Node Package Manager (NPM) installed (if you don't checkout this article on installing node & NPM on both Mac & Windows).
Then run the following command to install the TailwindCSS package in your themes "node_modules" directory (which will get created automatically):
npm install -D tailwindcss
npx tailwindcss init
If everything installed ok you should now see a "node_modules" directory & packages.json, packages-lock.json as well as tailwind.config.js files in your themes root directory.
Next in the /assets/src/css directory create a file called "style.css" and open it in a code editor (if you don't have one I recommend Visual Code Studio). Add the following to the style.css file & save it:
@tailwind base;
@tailwind components;
@tailwind utilities;
Now you need to compile the style.css file into pure CSS which will live in the /assets/dist/css directory with the same filename. Run the following build command in Terminal:
npx tailwindcss build -i assets/src/css/styles.css -o assets/dist/css/styles.css
Go to the /assets/dist/css directory and you should see a new style.css file, this means TailwindCSS and all it's classes have been compiled into the new style.css file and is ready to use.
To speed things up you can add build commands to the packages.json file under scripts:
  "scripts": {
    "build": "npx tailwindcss build -i assets/src/css/styles.css -o assets/dist/css/styles.css",
    "watch": "npx tailwindcss -i assets/src/css/styles.css -o assets/dist/css/styles.css --watch",
  },
Now you can just run the command npm rum build or npm run watch to run our build command a bit easier. The watch command will watch your source (src) CSS code for changes and process it if any changes occur.
Enable the Drupal theme
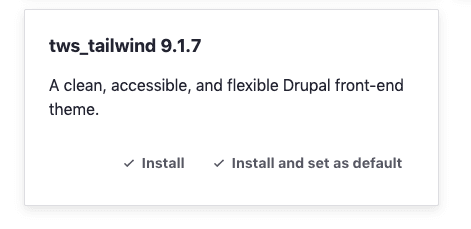
In the Drupal admin UI go to "Appearance" and you should see your new theme listed under "Uninstalled themes". Under the themes screenshot click the "Install and set as default" link to install the theme.
After you've installed the theme, go to your site homepage and you should see an unstyled frontpage. Go to "View Source" and "Find" the file "style.css" to ensure our CSS file is being loaded.

Enable twig debugging
So now we have our custom Drupal theme installed and TailwindCSS available to start building with. The next thing that needs to happen is we need to turn on Twig debugging. We'll do this so we can see Drupal template suggestions in the source code so we know which templates are being loaded and where we can override them.
We won't need to write any CSS code at all as TailwindCSS will provide everything we need so all our work will be within the Drupal Twig template files which we'll copy & paste from the core Stable theme into our custom Drupal theme.
This approach makes it quick & easy to quickly build a custom Drupal theme (well I think so at least!!)!
I'm assuming you're working locally (check out my post on local development with DDEV) as these will just be settings you need while your custom Drupal theme is in development and they should be reverted for production sites. To enable Twig debugging do the following:
Step 1: Copy & paste the /sites/development.services.yml file into sites/default and then open up the file in a code editor and add the following code:
parameters:
  http.response.debug_cacheability_headers: true
  twig.config:
    debug: true
    auto_reload: true
services:
  cache.backend.null:
    class: Drupal\Core\Cache\NullBackendFactory
Step 2: Open up your sites/default/settings.php file and replace
$settings['container_yamls'][] = $app_root . '/' . $site_path . '/services.yml';
with
$settings['container_yamls'][] = $app_root . '/' . $site_path . '/development.services.yml';
Then at the bottom of the settings.php file add the following:
$settings['cache']['bins']['render'] = 'cache.backend.null';
$settings['cache']['bins']['dynamic_page_cache'] = 'cache.backend.null';
$settings['cache']['bins']['page'] = 'cache.backend.null';
Save settings.php and clear your Drupal cache for the new settings to take effect. What we've done is turn all caching off & enabled Twig debugging so we can see which Twig template files are being used for which page elements.
NOTE: You can also include a settings.local.php file to store all your settings.php changes which is better practice but so I don't bloat this tutorial I'll cover that in another posts in the future.
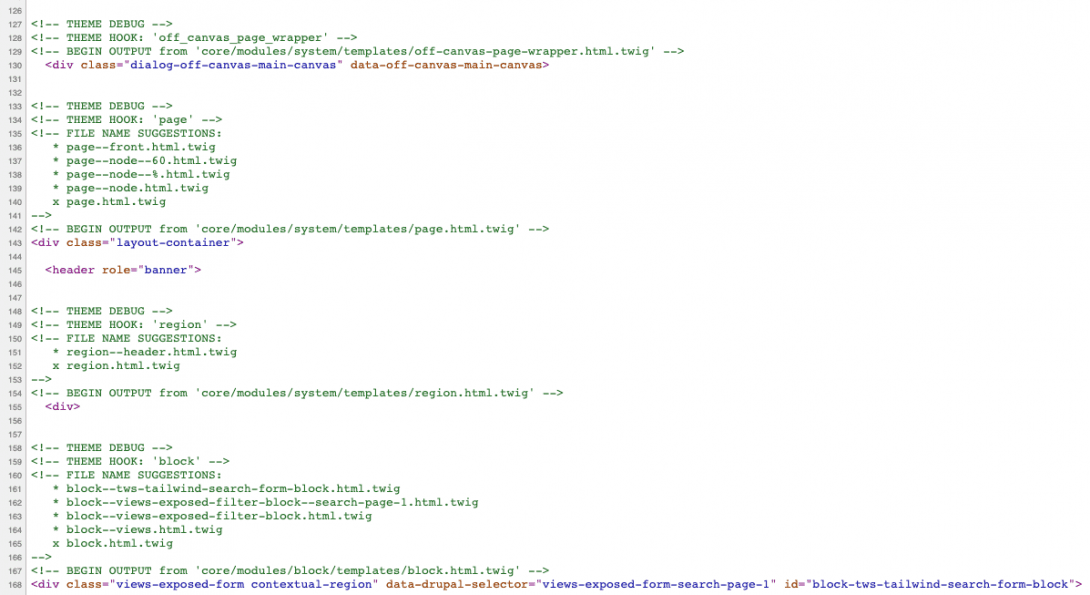
Now go to your homepage, View Source and you should see a load of code commenting showing you information about which Twig template files are being loaded for each page element!
Tailwind components
Before we start to build something to make our custom Drupal theme development even faster you can copy & paste TailwindCSS from snippet sites online assuming the licenses allow! TailwindCSS is still pretty new in comparison to say Bootstrap but it's still pretty easy to find component examples online to use in your projects. Here's 3 TailwindCSS components sites I regularly look at for ideas & snippets:
- Tailwindcomponents.com
- Tailwindtoolbox.com
- Tailblocks
- Tailwindcss.com (official documentation).
Start building custom Drupal Twig templates
Finally it's time to start overriding the Stable Twig templates and add the TailwindCSS classes.
For this tutorial we'll build a responsive navbar using just TailwindCSS for the CSS & Alpine.js for the Javascript interaction, this should give you a good base to go on and build the rest of your custom Drupal theme!
You can get the full source code for the custom Drupal theme over on GitHub, use it as you please :)
Add some Drupal blocks
Go to Administration -> Structure -> Block Layout and add the following blocks & save:
- "Site branding" to "Header" region
- "Main navigation" to "Primary menu" region
Next to go Administration -> Structure -> Menus -> Main Navigation and add some "dummy" menu items to use in the main menu navbar. Now there's some content to work with.
Find the right Twig templates to override
Hopefully you're familiar with using the browsers Element Inspector (or developer tools), if not check out this article on using Element Inspector in Chrome. I'll be using Google Chrome for this tutorial.
Hover your site title element then right click & click "Inspect", look for the div with the ID "block-THEMENAME-branding" and the view the comment lines above. You'll see something like this:
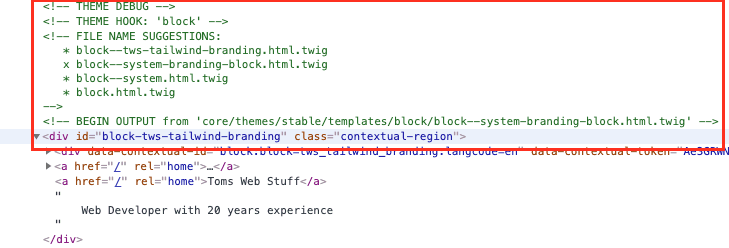
Under "FILE NAME SUGGESTIONS:" we can see the template suggestions which Drupal is looking for and then in the "BEGIN OUTPUT from" comment we can see which template file is actually being used at the moment and that's the file we want to copy & paste into the custom Drupal theme.
I suggest you open 2 Finder windows 1 with /core/themes/stable/templates and one with /themes/YOURNAME/templates (create that if you haven't already).
Copy & paste the core/themes/stable/templates/block/block--system-branding-block.html.twig file into /themes/custom/YOURNAME/templates/block and then clear the Drupal caches and then inspect the element again to confirm it's now using our custom Twig template file instead.

NOTE: It's good practice to use subfolders within /themes/custom/YOURNAME/templates although it's not required.
Now you can open up themes/custom/tws_tailwind/templates/blocks/block--system-branding-block.html.twig in your code editor and start to add TailwindCSS classes using the TailwindCSS components sites listed above.
My finished file looked something like this, I've added a simple icon from Heroicons.com:
{% extends "block.html.twig" %}
{#
/**
 * @file
 * Theme override for a branding block.
 *
 * Each branding element variable (logo, name, slogan) is only available if
 * enabled in the block configuration.
 *
 * Available variables:
 * - site_logo: Logo for site as defined in Appearance or theme settings.
 * - site_name: Name for site as defined in Site information settings.
 * - site_slogan: Slogan for site as defined in Site information settings.
 */
#}
{% block content %}
<div class="text-white mr-6">
  {% if site_name %}
    <a href="{{ path('<front>') }}" rel="home" class="flex items-center transition-opacity duration-300 no-underline hover:opacity-90 hover:no-underline">
      <svg class="fill-current text-purple-600 inline-block h-8 w-8 mr-3" xmlns="http://www.w3.org/2000/svg" viewBox="0 0 20 20">
        <path fill-rule="evenodd" d="M12.316 3.051a1 1 0 01.633 1.265l-4 12a1 1 0 11-1.898-.632l4-12a1 1 0 011.265-.633zM5.707 6.293a1 1 0 010 1.414L3.414 10l2.293 2.293a1 1 0 11-1.414 1.414l-3-3a1 1 0 010-1.414l3-3a1 1 0 011.414 0zm8.586 0a1 1 0 011.414 0l3 3a1 1 0 010 1.414l-3 3a1 1 0 11-1.414-1.414L16.586 10l-2.293-2.293a1 1 0 010-1.414z" clip-rule="evenodd" />
      </svg>
      <span class="text-yellow-400 text-2xl lg:text-3xl font-bold">{{ site_name }}</span>
    </a>
  {% endif %}

 </div>
{% endblock %}
Next we'll override page.twig.html using the same process of inspecting the comments and finding the Twig template file to override. Remember to clear your cache everytime you add a new Twig template override.
All I've done in page.twig.html is change the <header> tag & add an inner container:
    <header role="banner" class="w-full bg-gray-800 border-b-4 border-yellow-400">
    <div class="lg:flex lg:flex-wrap items-center justify-between p-5 lg:py-14 lg:pl-8 max-w-screen-lg xl:max-w-screen-xl mx-auto">
      {{ page.header }}
      {{ page.primary_menu }}
    </div>
  </header>
Giving me a bit more of a navbar/header look:

Now we'll make our menu items white & align them in a row on desktop. From inspecting the template suggestions I can see the file used for the navigation wrapper is block--system-menu-block--main.html.twig so like above we copy & paste (& rename) the Stable theme template/block/block--system-menu-block.html.twig file into our themes /templates/block directory then add some Tailwind CSS classes to the <nav> element to make the menu content stack on mobile and align as a row from large (lg:) screens up:
<nav role="navigation" aria-labelledby="{{ heading_id }}"{{ attributes|without('role', 'aria-labelledby', 'class') }} class="w-full flex-grow lg:flex lg:items-center lg:w-auto">
  {# Label. If not displayed, we still provide it for screen readers. #}
  {% if not configuration.label_display %}
    {% set title_attributes = title_attributes.addClass('visually-hidden') %}
  {% endif %}
  {{ title_prefix }}
  <h2{{ title_attributes.setAttribute('id', heading_id) }}>{{ configuration.label }}</h2>
  {{ title_suffix }}

  {# Menu. #}
  {% block content %}
    {{ content }}
  {% endblock %}
</nav>
To make the menu items white we need to go another template level down, copy, paste & then rename the Stable theme /templates/navigation/menu.html.twig file into /templates/navigation calling the file menu--main.html.twig and adding the following classes to the parent <ul> element & the navigation links themselves:
{% import _self as menus %}

{#
  We call a macro which calls itself to render the full tree.
  @see https://twig.symfony.com/doc/1.x/tags/macro.html
#}
{{ menus.menu_links(items, attributes, 0) }}

{% macro menu_links(items, attributes, menu_level) %}
  {% import _self as menus %}
  {% if items %}
    {% if menu_level == 0 %}
      <ul{{ attributes.addClass('pt-6 lg:pt-0 list-reset lg:flex justify-end flex-1 items-center') }}>
    {% else %}
      <ul>
    {% endif %}
    {% for item in items %}
      <li{{ item.attributes.addClass('lg:mr-3') }}>
        {{ link(item.title, item.url, { 'class':['block lg:inline-block tracking-wide text-white text-opacity-80 font-semibold no-underline transition duration-500 ease-in-out hover:text-opacity-95 hover:text-underline p-2'] }) }}
        {% if item.below %}
          {{ menus.menu_links(item.below, attributes, menu_level + 1) }}
        {% endif %}
      </li>
    {% endfor %}
    </ul>
  {% endif %}
{% endmacro %}
Now out menu looks a bit nicer & has some basic responsiveness (ie. it stacks on mobile, floats in a row on desktop):


We could leave things like this but let's roll in a bit of Alpine.js & a couple more Tailwind classes to give us a collapsible mobile menu too. Open up page.html.twig again and alter the <header> element to the following:
  <header role="banner" class="w-full bg-gray-800 border-b-4 border-yellow-400" x-data="{ open: false }">
    <div class="lg:flex lg:flex-wrap items-center justify-between p-5 lg:py-14 lg:pl-8 max-w-screen-lg xl:max-w-screen-xl mx-auto relative">
      {{ page.header }}

      <button class="absolute top-5 right-4 lg:hidden text-white text-opacity-80 font-semibold transition duration-500 ease-in-out hover:text-opacity-85"
        @click="open = ! open">
        Menu
      </button>

      <div class="w-full lg:w-auto lg:flex lg:items-center"
        :class="{ 'block': open, 'hidden': !open }"
        @click.outside="open = false">
        {{ page.primary_menu }}
      </div>
    </div>
  </header>
Alpine.js: I found out about Alpine.js from TailwindCSS (since Tailwind is pure CSS, no Javascript) and from what I've seen so far I love it's simplicity to use but how powerful it is. I'm planning to take a closer look at it & do some posts on it in weeks/months to come so stay tuned for those.

From here you can continue to override Drupal twig files & add in Tailwind CSS classes. Remember Tailwind is a utility-based CSS framework so you should rarely need to write any custom CSS code at all. If you do, you can add it to the style.css file we create or write a separate CSS file and imported it into style.css.
Production builds for a Drupal theme
As I mentioned above, Tailwind uses PurgeCSS to remove unused CSS classes in your production builds, this along with file minification helps to remove any potential bloat from your theme.
Right now my style.css is 4mb!

For PurgeCSS to work it needs to know what "content" files to look in to find out which CSS classes are in use and which are not, in our case this is our Twig template files (so far) but it can be any Drupal code which contains CSS classes like Javascript files, .theme files & even config YAML files. For the sake of your tutorial we'll keep it simple & just do Twig files & our .theme file.
Open up the tailwind.config.js file we created at the start so we can tell Tailwind where our "content" files are.
module.exports = {
  content: [
    'templates/**/*.twig',
    'tw_tws.theme'
  ],
  // ...
}
If you have any dynamic CSS class setting in your Twig files it's important the Tailwind CSS class names exist as complete unbroken strings ie. <div class="{{ error ? 'text-red-600' : 'text-green-600' }}"></div>
If you want content editors to be able to use certain Tailwind CSS classes there's also a "safelist" config option where you can enforce certain CSS classes to be kept in your production builds regardless of whether they are found in your "content" files.
module.exports = {
  content: [
    'templates/**/*.twig',
    'tw_tws.theme'
  ],
  safelist: [
    'bg-red-500',
    'text-3xl',
    'lg:text-4xl',
  ]
}
Now we can add a new packages.json script command for a production builds and Tailwind will read the "content" config (& any other config) automatically from the tailwind.config.js file:
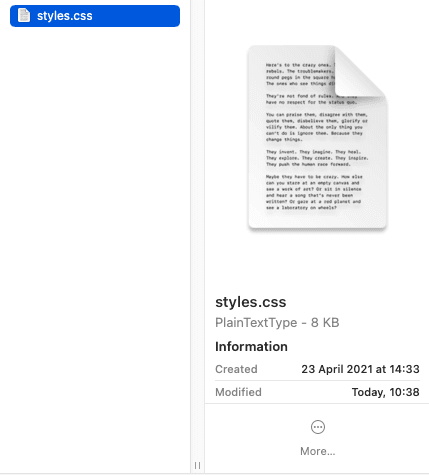
"build:prod": "npx tailwindcss build -i assets/src/css/styles.css -o assets/dist/css/styles.css --minify"Now my style.css file is just 8kb, that's pretty damm good!
Tailwind offers tonnes of other config options you can override but I'll cover more of those in a future post.
Summary
There, you now have the start of a custom Drupal theme using Tailwind CSS, from here you can use the same approach as we used to build our navbar/header to build out your theme letting Tailwind CSS do the heavy work!
The theme is available to download for free on GitHub, use it how you like, if you do please let me know in the comments below so I know this post was useful along with any comments & questions! Thanks for reading!